
Water and electricity don’t mix, which is why bathrooms are one of the most highly regulated spaces in the home. A GFCI outlet (ground fault circuit interrupter) is the unsung hero that stops electrocution before it happens. If your bathroom still has standard outlets, you’re working with outdated protection. Modern code requires GFCI protection in any bathroom outlet within 6 feet of a sink, and installing one takes about 30 minutes with basic tools. This guide walks through what GFCI outlets do, current safety codes, and how to swap one in yourself.
Table of Contents
ToggleKey Takeaways
- A GFCI outlet cuts power in 4–6 milliseconds when it detects current leakage, making it essential bathroom protection that has dramatically reduced electrocution deaths.
- National Electrical Code requires GFCI outlets within 6 feet of any bathroom sink, and this regulation is mandatory in all 50 states.
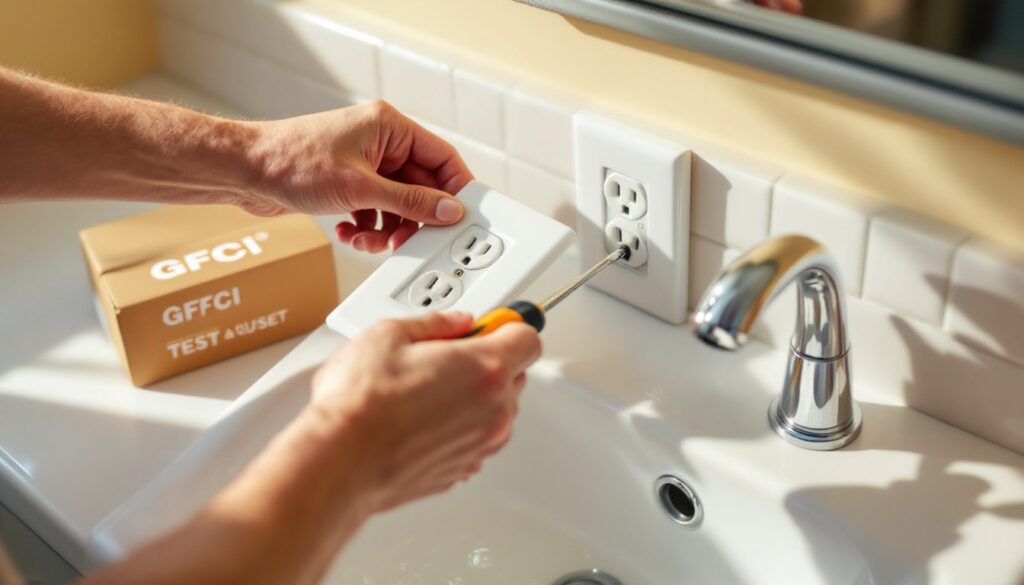
- Installing a GFCI outlet yourself takes about 30 minutes with basic tools like a voltage tester and screwdriver, making it an accessible DIY replacement project.
- GFCI outlets can protect downstream standard outlets on the same circuit through ‘load protection’, saving money when you only need one per circuit.
- Test your GFCI outlet monthly by pressing the TEST button to ensure it trips immediately and resets properly, replacing any outlet that fails this safety check.
- Bathroom ventilation and moisture control extend GFCI outlet lifespan from the typical 15–25 years, preventing premature failure from humidity and power surges.
What Is a GFCI Outlet and Why Bathrooms Need One
A GFCI outlet monitors the electricity flowing in and out of a device. The moment it detects an imbalance, like current leaking through water or wet skin, it cuts power in milliseconds, typically within 4–6 milliseconds. That speed is what saves lives.
Bathrooms are dangerous because moisture and electricity are in close quarters. A hair dryer dropped in a sink, a phone charger knocked into standing water, or even a wet hand reaching for a standard outlet can create a path to ground. Before GFCI protection existed, hundreds of people died each year from bathroom electrocution. Now, GFCI outlets have cut those deaths dramatically.
Standard outlets have no idea when current is leaking: they only react when there’s an overload (tripping a breaker). A GFCI outlet is far more sensitive. It’s designed specifically for areas where water is present and people might be wet or barefoot. Kitchens, garages, basements, outdoor outlets, and poolside areas also require GFCI protection under the National Electrical Code (NEC).
Code Requirements and Safety Standards for Bathroom GFCI Protection
The National Electrical Code (NEC) Article 210.8 mandates GFCI protection for all bathroom receptacles (outlets) that supply power within 6 feet of a sink or any basin where water is used. This isn’t a suggestion, it’s required by law in all 50 states, though some municipalities add stricter rules.
The 6-foot rule is measured horizontally along the countertop or floor. If an outlet is 6.5 feet from the sink, technically it doesn’t require GFCI protection by code, though many electricians and inspectors recommend it for safety.
Protection can come in two forms: a GFCI outlet itself or a GFCI circuit breaker that protects the entire circuit. Your local building inspector can confirm which method your jurisdiction prefers, though outlet-level protection is more common in retrofit projects since it doesn’t require panel work.
IMPORTANT: Building codes vary slightly by region. Before you start, check with your local building department or inspections office, some areas have adopted newer NEC standards or added local amendments. If you’re planning any electrical work, a permit may be required. Many homeowners install GFCI outlets without permits for replacement work (swapping an existing standard outlet), but major rewiring or adding new circuits often triggers permit requirements.
Types of GFCI Protection: Outlets vs. Circuit Breakers
You have two ways to add GFCI protection to your bathroom: install a GFCI outlet or install a GFCI circuit breaker in your electrical panel.
GFCI Outlets are the most common choice for bathrooms. You simply replace an existing standard outlet with a GFCI-protected outlet. The device itself monitors for ground faults and trips instantly if current leaks. Many GFCI outlets also have a feature called “load protection”, they protect outlets downstream on the same circuit. For example, a GFCI outlet in one part of the bathroom can protect a standard outlet elsewhere on the same circuit. This saves money if you only need to install one GFCI per circuit.
GFCI Circuit Breakers protect the entire circuit from the panel. Instead of replacing an individual outlet, you swap the breaker in the electrical panel. This method protects every outlet on that circuit but requires working inside the panel, definitely a job for a licensed electrician unless you have panel experience.
For most DIY bathroom projects, a GFCI outlet is the practical choice. It’s straightforward to install, doesn’t require panel access, and lets you protect exactly what you need. If your bathroom has multiple circuits or an older panel, an electrician can advise whether a GFCI breaker makes more sense. The upfront cost of GFCI outlets is roughly $15–$30 per unit: GFCI breakers cost $40–$100 and require professional installation.
Step-by-Step Guide to Installing a GFCI Outlet in Your Bathroom
Tools and Materials You’ll Need
Materials:
• GFCI outlet (20-amp or 15-amp, depending on your circuit)
• Wire nuts (if replacing old connections)
• Electrical tape (optional but recommended for extra security)
Tools:
• Voltage tester (non-negotiable, confirms the power is off)
• Screwdriver (flat-head and Phillips, or multi-bit driver)
• Wire strippers (if remaking connections)
• Flashlight or headlamp (bathrooms aren’t always bright)
• Pliers (for gripping wire)
Safety gear:
• Safety glasses
• Work gloves
Installation Process
Step 1: Turn off power at the breaker panel. Locate the breaker that controls the outlet you’re replacing. Switch it off. Write a note or use tape to mark it so no one turns it back on while you work.
Step 2: Test the outlet to confirm power is off. Plug a lamp or use a voltage tester on both the outlet and any metal parts nearby (like the box or fixture). This is the most critical safety step, never skip it. If you see any power, stop and recheck the breaker.
Step 3: Unscrew and remove the old outlet. Remove the cover plate, then unscrew the outlet from the electrical box. Gently pull it out without touching the wires.
Step 4: Disconnect the wires. Most outlets have two terminal screws: one brass (hot/power) and one silver (neutral), plus a green ground screw. Note their positions or take a photo. Loosen the screws and carefully remove each wire. If the wires are corroded or the terminals are damaged, strip about 3/4 inch of fresh insulation and remake the connection.
Step 5: Connect wires to the GFCI outlet. On the GFCI, you’ll see “LINE” terminals (power in from the breaker) and “LOAD” terminals (power out to downstream outlets). For a basic installation, connect the hot wire to the brass LINE terminal, the neutral wire to the silver LINE terminal, and the ground wire (bare copper or green) to the green LINE terminal. Use a detailed step-by-step guide on installing a GFCI outlet if you need visual confirmation of terminal locations.
Tighten screws firmly but don’t over-tighten: you want a solid connection without stripping the screw or damaging the wire.
Step 6: Push the outlet into the box. Carefully tuck wires into the box and slide the outlet in, then screw it down so it sits flush with the wall.
Step 7: Screw in the cover plate. Use the provided screw to attach the face plate. Many GFCI outlets have extra-wide faces to cover larger openings.
Step 8: Turn power back on. Switch the breaker back on. Press the TEST button on the outlet, it should trip immediately (power cuts to the outlet). Then press RESET to restore power. If nothing happens, turn off the breaker and recheck your connections. This is your proof the outlet is working.
Testing and Maintaining Your Bathroom GFCI Outlet
Once installed, test your GFCI outlet once a month. Press the TEST button, power should cut immediately. Press RESET to restore it. If the outlet won’t trip or reset, it’s faulty and needs replacement.
GFCI outlets are fairly bulletproof, but a few things can wear them down. Moisture, humidity, and temperature swings in bathrooms shorten their lifespan compared to outlets in dry areas. Most GFCI outlets last 15–25 years, though some fail sooner if exposed to constant moisture or power surges. If an outlet trips repeatedly without a real fault, it’s probably dying and should be replaced.
Regular bathroom ventilation helps, too. A running exhaust fan during and for 20 minutes after showers reduces humidity and extends the life of all electrical components. Caulk any gaps around the outlet box where moisture could seep in from the wall cavity.
If you notice an outlet that won’t hold a reset or frequently trips, don’t ignore it. Rather than risk an electrical hazard, unplug devices and have an electrician test the circuit for actual faults or recommend replacement. Many electricians will troubleshoot for a modest service call fee, money well spent for peace of mind.
One more note: GFCI protection has a testing procedure that some municipalities require annually or during home inspections. Your inspector might ask to see a working test during a sale or refinance. Having current outlets that respond correctly to test/reset buttons helps pass inspections smoothly. If you’ve installed a GFCI outlet correctly and it’s working, you’ve got solid protection and a home that meets modern electrical code. The comprehensive guide to GFCI outlet installation covers troubleshooting if you run into unexpected issues. For advanced troubleshooting or panel work, professional instructions for GFCI receptacles can also help electricians confirm best practices.