
Tired of looking at those tired, worn-out baseboards that have seen better days? It’s time to kick those sad planks to the curb and give your space the upgrade it deserves. DIY baseboard replacement isn’t just a home improvement task; it’s a chance to unleash your inner handyman or handywoman. Plus, it’s a lot more fun than binge-watching another season of that show you’ve seen a hundred times.
Understanding DIY Baseboard Replacement
DIY baseboard replacement serves as a practical home improvement project. This task enhances both the aesthetic appeal and the functionality of a living space.
What Are Baseboards?
Baseboards function as the trim that sits along the bottom of walls. They provide a transition between the wall surface and the floor. Typically made from materials like wood, MDF, or PVC, baseboards protect walls from scuffs and damage. Additionally, they can add character to a room by complementing various design styles.
Why Replace Baseboards?
Replacing baseboards improves overall appearance. Worn, damaged, or outdated boards detract from a room’s look and feel. An upgraded baseboard can modernize a space, making it more inviting. Enhanced protection against wear and tear also provides added benefits. New baseboards can cover gaps and imperfections, ensuring a clean finish. Investing time in this project leads to an immediate improvement in home aesthetics.
Tools and Materials Needed
Selecting the right tools and materials simplifies the DIY baseboard replacement process. Understanding what’s necessary helps ensure a successful project.
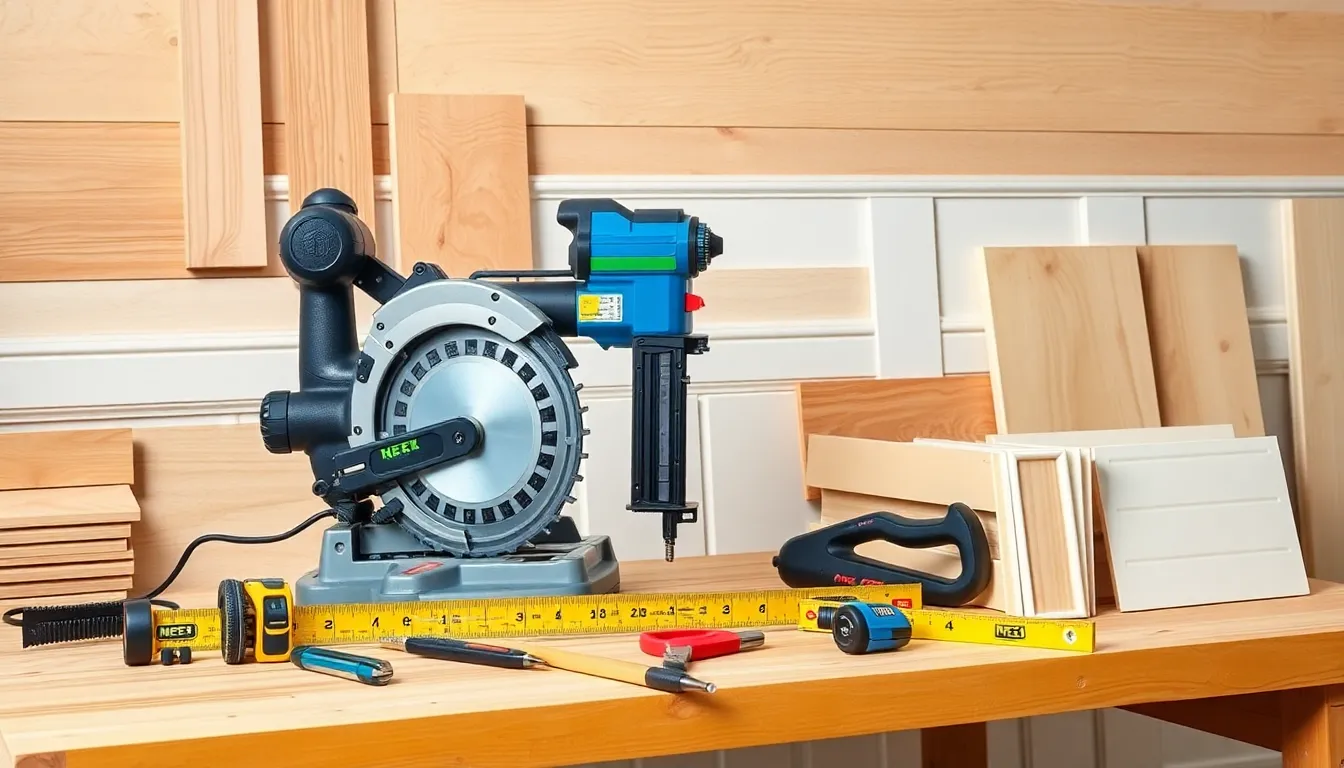
Essential Tools for DIY Baseboard Replacement
- Miter Saw: A miter saw accurately cuts corners at the right angles for clean edges.
- Nail Gun: This tool speeds up installation by driving nails into the baseboards without manual effort.
- Measuring Tape: Essential for ensuring precise lengths before cutting materials.
- Stud Finder: Identifying wall studs ensures secure attachment of the baseboards.
- Level: A level checks that baseboards are straight, which is vital for a polished look.
- Pry Bar: For removing existing baseboards without causing damage to the walls.
Recommended Materials and Supplies
- Baseboards: Choose quality materials like wood or MDF, available in various styles and sizes.
- Nails: Use finishing nails appropriate for the thickness of the baseboards.
- Caulk: A high-quality caulk helps fill gaps between baseboards and walls for a seamless finish.
- Wood Filler: This product repairs any imperfections or nail holes in the baseboards.
- Paint or Stain: Depending on the look desired, both options enhance the appearance of the baseboards.
- Safety Gear: Goggles and gloves protect against dust and sharp tools during the project.
Step-by-Step Guide to DIY Baseboard Replacement
This guide outlines each step necessary to replace baseboards effectively.
Preparing the Space
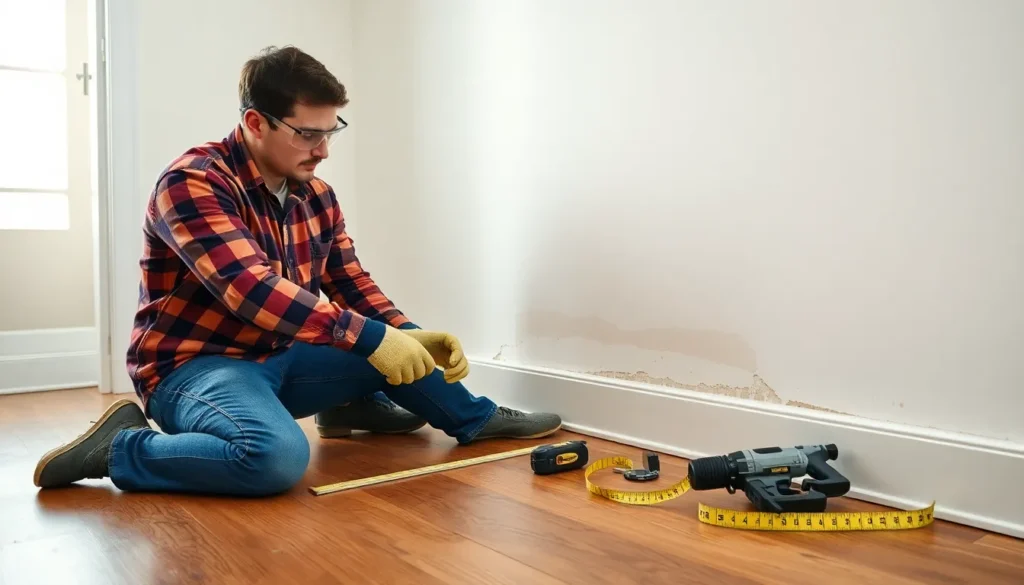
Clear the area around the baseboards to create a safe and spacious working environment. Move furniture away from walls, removing any decor or items that could obstruct access. Inspect walls for damages and patch holes using spackling compound, allowing for a clean surface. Use a measuring tape to determine the length of the new baseboards needed for accurate cuts. Gather all required tools and materials beforehand to streamline the project.
Removing Old Baseboards
Begin by scoring the top of the old baseboard with a utility knife, cutting through paint and caulk to prevent wall damage. Insert a pry bar between the wall and baseboard, slowly prying it away from the wall. Protect the wall with a putty knife to minimize scratches. Take care when handling tools to avoid injury, and ensure safety goggles are worn. Dispose of old baseboards responsibly, recycling where possible.
Installing New Baseboards
Measure and cut the new baseboards using a miter saw for clean, precise angles at corners. Position each piece against the wall, ensuring it fits snugly. Use a level to check for straightness before fastening. A nail gun secures the boards, driving nails into the wall studs for stability. Caulk gaps between the wall and baseboard for a polished look, then wipe away any excess with a damp cloth.
Finishing Touches
After installing the new baseboards, fill any visible nail holes with wood filler. Sand the area smoothly once dried to achieve a seamless finish. Paint or stain the baseboards for enhanced appeal, choosing a color that complements the room’s decor. Finally, inspect the installation for any irregularities, ensuring everything appears neat and aligned. This attention to detail enhances the overall look of the space.
Tips for Success
Success in DIY baseboard replacement largely depends on preparation and careful execution. Adhering to best practices ensures a polished final look while avoiding common pitfalls enhances the overall process.
Common Mistakes to Avoid
Mistakes during installation can lead to unnecessary rework. Failing to measure twice often results in incorrect cuts. Ignoring wall imperfections leads to uneven installations. Neglecting to use a stud finder may cause unsecured attachments. Not filling nail holes properly creates an unrefined appearance. Skipping safety gear increases the risk of injury. Finally, foregoing caulk can leave visible gaps that detract from professionalism.
Best Practices for a Professional Finish
Achieving a professional finish involves several key practices. Start with selecting quality baseboards that match the room’s style. Use a level to ensure even placement. Apply caulk with precision along the seams for a seamless look. Sand down any rough edges for smooth transitions. Paint or stain the baseboards before installation whenever possible to prevent mess. Take time to clean up dust and debris for a tidy workspace. Arranging tools and materials beforehand streamlines the process and boosts efficiency.
Replacing baseboards can transform a space and boost its overall appeal. This DIY project not only enhances aesthetics but also allows individuals to showcase their skills and creativity. With the right tools and materials anyone can tackle this rewarding task and achieve professional results.
Taking the time to prepare properly and follow best practices ensures a polished finish that elevates the entire room. By avoiding common mistakes and focusing on quality materials, the outcome will be both functional and visually pleasing. Embracing this hands-on approach not only improves the home but also instills a sense of accomplishment that comes from completing a project on one’s own.