
Tiny home kits have evolved from a niche curiosity into a genuine solution for people seeking affordable, sustainable housing. Whether you’re drawn to the DIY appeal of building a tiny house yourself, the cost savings of a prefab tiny home kit, or simply the lifestyle shift that comes with downsizing, 2026 offers more accessible options than ever before. These kits, from complete tiny house kits for sale to diy tiny home kits designed for hands-on builders, strip away much of the guesswork and contractor dependency. This guide walks you through what tiny home kits actually are, how to choose one that fits your skills and budget, and what the real installation process looks like from start to finish.
Table of Contents
ToggleKey Takeaways
- Tiny home kits reduce construction costs to $25,000–$75,000 for the kit alone, making homeownership more accessible through prefabricated materials and streamlined assembly compared to traditional building methods.
- Choose between prefab turnkey kits (4–8 weeks, higher cost) and build-from-scratch DIY tiny house kits (3–6 months, more customization and lower price) based on your skills, budget, and timeline.
- Prioritize foundation quality, roof engineering, utility rough-ins with pre-drilled pathways, and comprehensive documentation to avoid costly mistakes and ensure code compliance in your tiny home kit build.
- The total realistic cost for a permitted, livable tiny home ranges from $47,000 to $145,000 when factoring in foundation, utilities, finishes, permits, and labor—budget carefully to avoid surprises.
- Follow the seven-phase DIY installation sequence (site prep, framing, weatherization, utility rough-in, windows/doors, insulation/drywall, finishes) and always obtain permits and inspections to prevent structural problems and legal issues.
- Tiny home kits empower affordability, customization, and sustainability, but success depends on understanding local building codes, recruiting helpers for heavy phases, and respecting prep and inspection timelines.
What Are Tiny Home Kits and Why They’re Gaining Popularity
A tiny home kit is essentially a prefabricated package that contains most or all of the materials and instructions needed to build a dwelling under 400 square feet. Unlike ordering supplies separately and hiring a contractor for every step, a kit consolidates the process into one streamlined bundle. Some arrive with wall panels pre-cut and pre-assembled: others ship as raw materials with detailed blueprints for hands-on assembly.
The appeal is multifaceted. First, there’s the cost advantage: tiny home kits for sale typically run $30,000 to $80,000 for the shell and structure, a fraction of what you’d pay for conventional construction. Labor savings matter too: when you build a tiny home yourself using a diy tiny house kit, you eliminate contractor markups. Second, there’s control: you know exactly what goes into your space and can customize finishes to match your design vision. Third, there’s the environmental angle, smaller footprint, fewer materials, lower heating and cooling demands.
The market has exploded because remote work made location flexibility possible, housing affordability became critical for millennials and Gen Z, and social media made tiny living visually aspirational. What started as a fringe movement is now a recognized segment with commercial interest.
The Different Types of Tiny Home Kits Available
Prefab vs. Build-It-Yourself Models
Understanding the spectrum of tiny home kits helps you pick what matches your time, skill, and budget. The market spans two primary approaches.
Prefab or “Turnkey” Kits arrive with most framing, walls, and systems already assembled. You’ll mostly handle final finishing, utilities hookup, and setup. These are faster, often 4 to 8 weeks start to livable, but pricier. Examples include shell-only kits where walls and roof are pre-assembled panels you bolt together on-site.
Build-from-Scratch Kits ship as raw lumber, structural materials, and detailed plans. Building a tiny house this way demands more time and carpentry skill, but costs less and offers maximum customization. A diy tiny house project using this model typically takes 3 to 6 months depending on your pace and helpers. These appeal to builders wanting hands-on control and those eager to explore creative design solutions.
Hybrid Models sit in the middle, pre-cut lumber and some pre-assembled components (trusses, door frames) but significant assembly required. These balance convenience with affordability.
Each model ships with varying levels of detailed plans. Some include video walkthroughs: others rely on PDF blueprints. Clarify what documentation comes with your kit before committing.
Key Features to Look for When Choosing a Tiny Home Kit
Not all tiny home kits deliver equal value. A few non-negotiable criteria will save frustration and money down the road.
Foundation and Frame Quality: Ensure the kit specifies lumber grade (2×4 studs, floor joists rated for your climate). Check if the design accounts for local snow load, wind rating, and seismic requirements, these vary by region. A poorly engineered frame leads to settling, cracks, and costly repairs. Look for kits engineered to meet or exceed International Residential Code (IRC) standards.
Roof System: Does the kit include trusses or rafters, and are they pre-assembled? A quality roof prevents water infiltration, the leading cause of tiny house problems. Verify whether sheathing, underlayment, and flashing are included, or if you’re buying those separately.
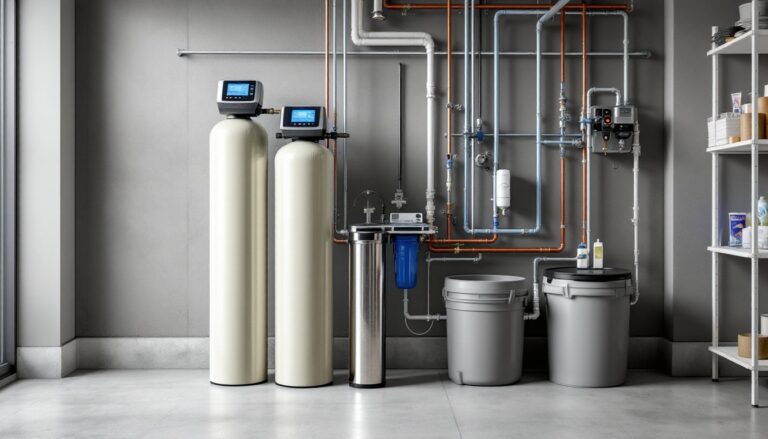
Utility Rough-Ins: Electrical, plumbing, and HVAC placement matter enormously in tiny spaces. Some kits come with pre-drilled holes and labeled pathways for running wires and pipes. Others leave you to figure it out, which invites code violations and sloppy installation. Confirm whether the kit includes conduit, outlet boxes, and plumbing stub-outs or if those are add-ons.
Documentation: Request sample pages from the build manual before purchasing. Is it clear? Are measurements in both imperial and metric? Are there diagrams for the trickiest steps (roof assembly, window installation, electrical rough-in)? Poor documentation turns a manageable project into a guessing game.
Material Grade and Sourcing: Check whether lumber and materials meet certification standards (FSC for sustainable sourcing, pressure-treated where appropriate for moisture-prone areas). Cheap particle board cabinetry or undersized hardware fails fast in a living space you’ll occupy daily.
Support and Warranty: Does the manufacturer offer phone or email support? What warranty covers defects in materials? Some kits include on-site consultation: others offer zero support post-sale. Factor support into your decision, especially if you’re a first-time builder.
Cost Breakdown: Budget Planning for Your Tiny Home Project
Transparency about costs prevents sticker shock and helps you plan realistically. Tiny home kits vary widely, but a structured breakdown clarifies what you’re paying for.
Kit Cost: $25,000 to $75,000 depending on kit type and size. A basic diy tiny house kit (2×4 framing, plywood sheathing, trusses, doors, windows) sits around $30,000–$40,000. A prefab shell-only model runs $50,000–$75,000. Luxury or specialized kits (off-grid, mobile-ready, premium finishes) exceed $80,000.
Foundation: $5,000 to $15,000. You’re building this separately, not included in the kit. Options include concrete slab, pier-and-beam, or gravel pad (least stable, not recommended for permanent structures). Foundation costs depend on site prep, soil conditions, and local labor rates.
Utilities and Systems: $8,000 to $20,000. Licensed electricians and plumbers typically must run main service panels and drain lines (code requirement in most jurisdictions). DIYers can rough-in wiring and plumbing under a permit in some areas, but final inspection and tie-in usually require licensed professionals. Budget $2,000–$5,000 for electrical, $3,000–$8,000 for plumbing, and $3,000–$7,000 for heating/cooling (even a small space needs adequate HVAC).
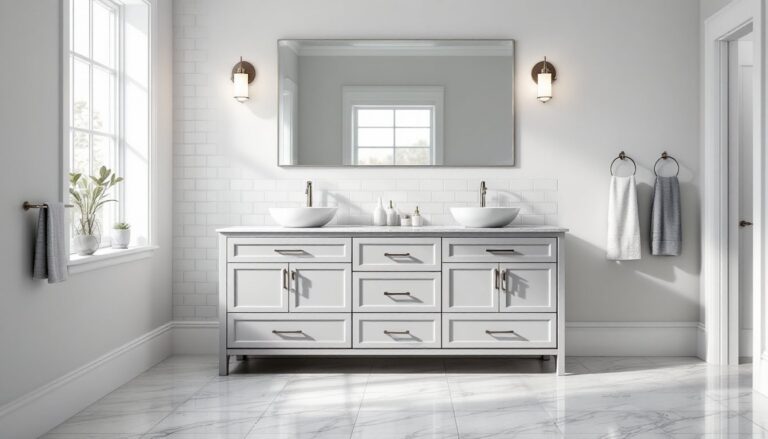
Finishes and Fixtures: $3,000 to $12,000. Interior paint, flooring, cabinetry hardware, plumbing fixtures, and appliances. You can diy paint and some flooring: fixtures and appliances are harder to DIY. Budget creep happens here, a $200 faucet vs. a $1,000 one makes a difference.
Permits and Inspections: $1,000 to $3,000. Building permits vary by jurisdiction: some counties are tiny-house-friendly, others resistant. Plan for building, electrical, and plumbing inspections. Unpermitted tiny homes can face legal issues and resale problems.
Labor (if outsourcing any assembly): $5,000 to $25,000. If you handle all DIY work yourself, labor is sweat equity. Hiring carpenters for framing or specialists for roof assembly adds cost.
Realistic Total Range: $47,000 to $145,000 for a livable, permitted tiny home, depending on how much you DIY and regional cost-of-living factors.
Note: Material costs and labor rates fluctuate with market conditions. Get quotes from local suppliers and contractors before committing to a kit.
The DIY Installation Process: What to Expect
Whether you’re building a tiny home from a diy tiny home kit or assembling prefab components, the installation sequence matters. Skipping or shortcutting steps invites structural and code problems.
Phase 1: Site Prep and Foundation (2 to 4 weeks)
Level the lot, compact soil, and pour or build the foundation. This is non-negotiable and often outsourced to professionals. Once foundation cures (at least 7 days for concrete), you’re ready for framing.
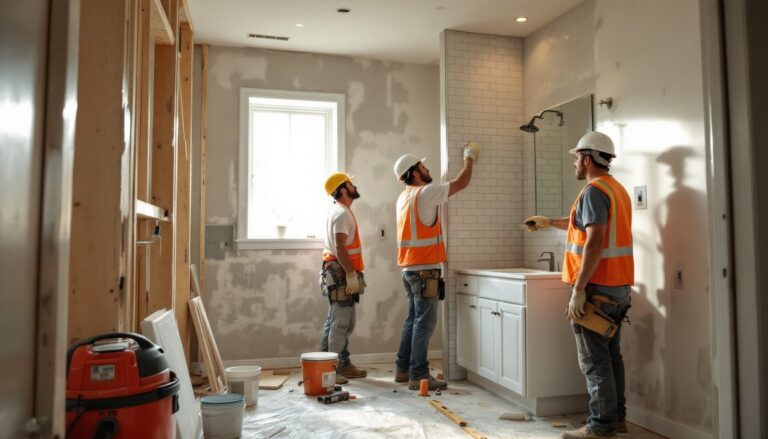
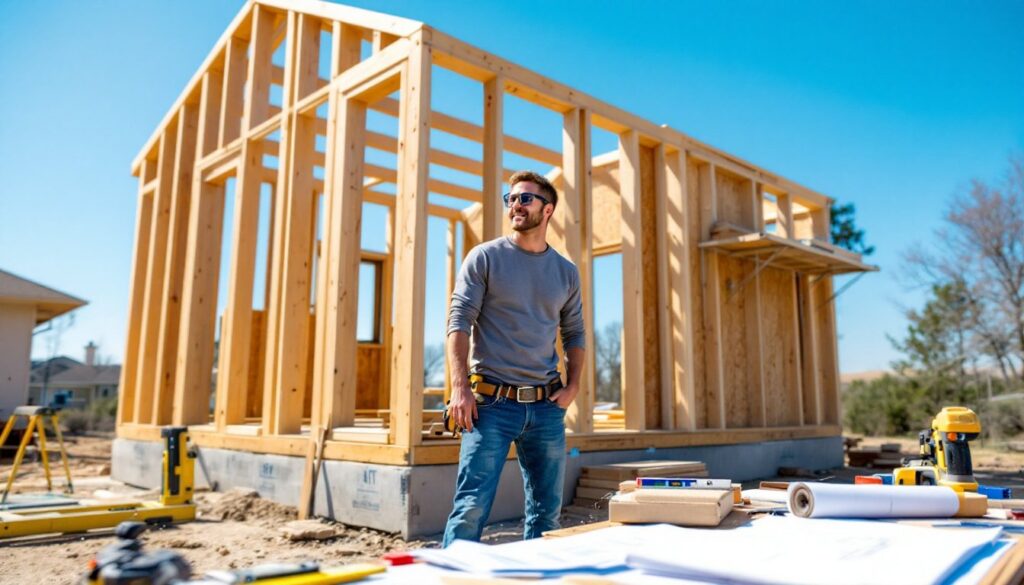
Phase 2: Framing and Roof Assembly (3 to 6 weeks)
Unpack framing materials, sort them, and lay out the floor plan. If you’ve never framed a wall, expect a learning curve. Basic steps: lay down sill plates (pressure-treated 2x lumber bolted to the foundation), assemble studs into wall sections, raise walls, brace them temporarily, add blocking and backing for future plumbing and electrical. Roof assembly follows, either install pre-cut trusses or build rafters on-site. This is heavy work: recruit helpers. Wear safety glasses and gloves: falling studs or nail guns injure careless hands quickly.
Phase 3: Sheathing and Weatherization (1 to 3 weeks)
Once the frame stands, sheathe walls with plywood or OSB, install house wrap (water-resistant barrier), and add roofing underlayment. Seal penetrations where pipes or wires exit. Poor weatherization causes water infiltration and mold. Don’t rush this phase.
Phase 4: Utility Rough-In (2 to 4 weeks)
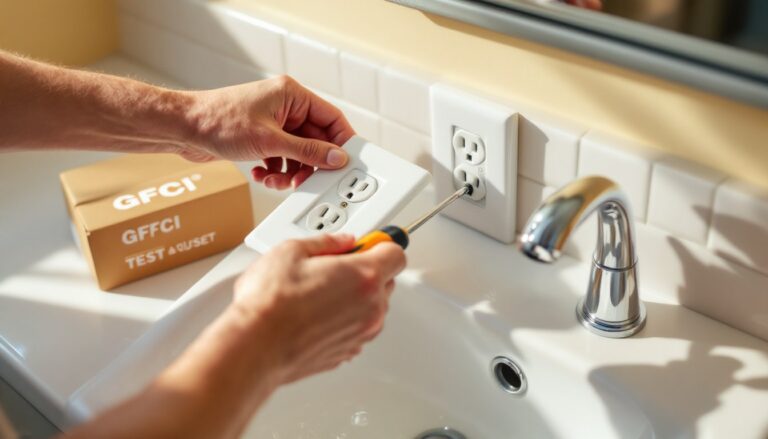
Run electrical conduit, outlet boxes, and wiring (if code permits DIY work in your jurisdiction). Install plumbing supply lines and waste/vent stacks. HVAC ductwork or rough piping follows. At each stage, pull a permit and request inspection before covering walls with drywall. Inspectors catch errors before they’re buried behind walls. Licensed professionals must typically handle main panel work and final connections, verify local requirements with your building department.
Phase 5: Windows and Doors (1 week)
Install window and door frames, flash them properly (critical to prevent leaks), and seal with sealant. This is simpler than you’d think if the rough openings are correct and the units are pre-hung.
Phase 6: Drywall, Insulation, and Interior Framing (3 to 5 weeks)
Insulate walls and ceiling (check R-value requirements for your climate), then hang and finish drywall. Taping and mudding drywall is tedious but learnable. Interior framing for cabinetry, shelving, and loft structures happens here. This phase determines livability quality, good insulation and air sealing translate to lower utility costs.
Phase 7: Finishes and Systems Tie-In (4 to 8 weeks)
Paint, install flooring, mount cabinetry, hang fixtures, and connect utilities. Licensed professionals finalize electrical, plumbing, and HVAC. Schedule final inspections. Once signed off, utilities are activated, and you’re move-in ready.
Common DIY Mistakes:
- Skipping measurements and assuming dimensions from plans are always accurate, site conditions vary.
- Underestimating fastener quantities (nails, screws, bolts). Buy 20% extra.
- Ignoring local building codes and permits. Unpermitted work invites fines and resale complications.
- Rushing roof or foundation work, these determine the entire structure’s integrity.
- Poor ventilation planning in tiny spaces, leading to humidity and mold.
Consult home improvement and DIY guides from experienced sources to master unfamiliar techniques before tackling your build.
Conclusion
Tiny home kits democratize homeownership and put you in control of the building process. Whether you choose a prefab model or embrace a full diy tiny house build, the rewards, affordability, customization, sustainability, justify the effort. Start by clarifying your skills, timeline, and budget. Research kits thoroughly, verify foundation and utility requirements for your jurisdiction, and don’t skip permits or inspections. The difference between a well-built tiny home and a problematic one often comes down to patience during prep and inspection phases. Your finished space is worth every careful step.