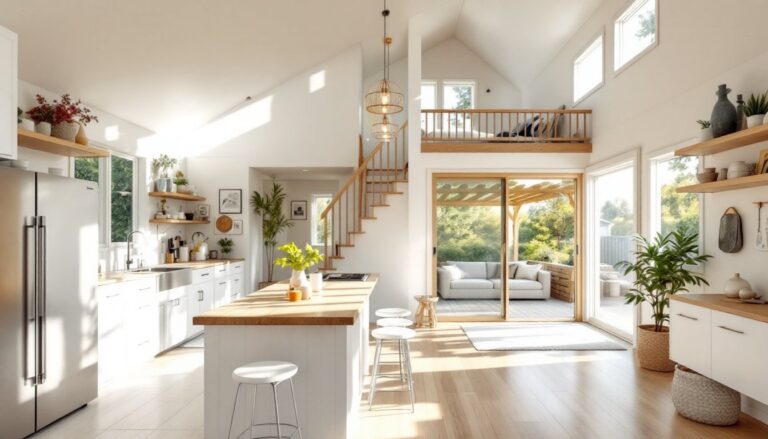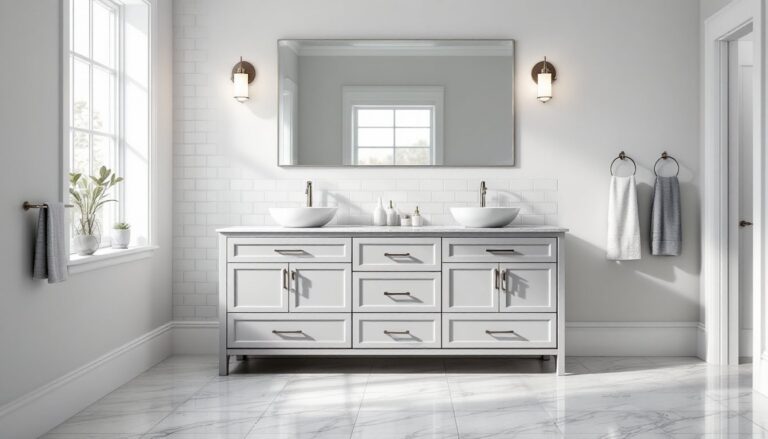
A bathroom vanity with top is one of the most visible and functional elements in a bathroom remodel. Whether you’re replacing an aging fixture or upgrading your space, the right vanity with top can transform both the look and practicality of your bathroom. The market has expanded considerably in 2026, offering homeowners countless materials, styles, and sizes to choose from. This guide walks you through material options, sizing considerations, installation nuances, maintenance best practices, and design trends so you can make an well-informed choice that fits your budget and aesthetic.
Table of Contents
ToggleKey Takeaways
- A bathroom vanity with top’s material choice—from budget-friendly laminate to premium quartz—directly impacts durability, maintenance demands, and long-term cost, so select based on your lifestyle and budget.
- Proper sizing and measurement are critical; standard widths range from 24–60 inches and height typically runs 30–32 inches, with comfort height options up to 36 inches for reduced back strain.
- Natural stone tops like granite require annual sealing, while quartz and cultured marble need minimal maintenance, making them ideal choices for busy households seeking low-effort upkeep.
- Installation requires careful prep work including leveling the base, reconnecting plumbing correctly, and caulking the perimeter to prevent water damage—hire a professional if you’re unsure about plumbing connections.
- Wiping spills immediately, using pH-neutral cleaners appropriate for your material, and maintaining proper bathroom ventilation are simple daily habits that extend your vanity with top’s lifespan by years.
- Pre-assembled vanity-top combos and refurbishing existing cabinets offer smart budget alternatives, potentially saving 15–25% compared to custom orders.
Understanding Bathroom Vanity Tops: Materials and Options
The vanity top is where form meets function, it needs to handle daily moisture, resist staining, and look good for years. Your material choice affects durability, maintenance demands, cost, and aesthetic appeal.
Popular Vanity Top Materials Explained
Ceramic Tile remains a budget-friendly, durable option. It’s easy to clean and widely available in countless colors and finishes. The grout lines can be a maintenance hassle, though, grout traps moisture and mildew if not sealed properly. Plan for periodic resealing and occasional grout cleaning.
Cultured Marble is a composite material (marble dust bound with resin) that mimics natural stone at a lower price point. It’s non-porous, stain-resistant, and requires minimal maintenance. But, it can scratch with abrasive cleaners and isn’t as heat-resistant as natural stone. Most homeowners appreciate the low-maintenance appeal.
Granite and Quartz are premium choices offering superior durability and visual impact. Granite is a natural stone that must be sealed annually to resist staining: quartz is engineered and non-porous, requiring virtually no sealing. Both are heat-resistant and highly stain-resistant, though quartz is more uniform in appearance. Expect to pay 40–60% more than cultured marble for these materials.
Laminate Tops are the most budget-conscious choice, starting under $200 for ready-made units. Modern laminates have improved significantly and can mimic stone convincingly. The downside: they’re vulnerable to moisture damage if water seeps into the substrate, and they can’t be repaired, replacement is the only option. Laminate works well for rental properties or temporary solutions.
Solid Surface Materials (like Corian) occupy the middle ground: non-porous, seamless, and repairable if minor damage occurs. They’re warmer to the touch than stone and available in numerous colors. They require gentle cleaners and aren’t as heat-resistant as natural stone.
When evaluating vanity tops, consider your daily habits. A busy family with kids benefits from durable, low-maintenance quartz. A design-focused homeowner who appreciates natural variations might prefer granite. Renters and budget-conscious buyers should look toward ceramic, cultured marble, or laminate. You’ll find extensive selections on platforms like Houzz featuring vanity with top options in all price ranges.
Sizing and Fit: Choosing the Right Vanity With Top
Measuring correctly is non-negotiable. A vanity that’s too narrow leaves no counter space: one that’s too wide crowds the bathroom. Start by measuring your existing vanity or the space where you plan to install one.
Standard widths range from 24 inches to 60 inches. Single-sink vanities typically run 30–48 inches wide, while double-sink units start at 48 inches and go up to 72 inches or more. Measure wall-to-wall in your bathroom and subtract clearance distances. Most codes require a minimum of 15 inches of clearance on each side of the vanity centerline for comfortable use, that’s a practical rule of thumb even if codes vary locally.
Depth is usually 21–22 inches for the vanity base, with the top potentially overhanging by 1–2 inches. This depth accommodates standard plumbing and feels proportional in most bathrooms. Shallow vanities (16–18 inches) exist but limit counter space and plumbing flexibility.
Height matters more than many homeowners realize. Standard vanity heights are 30–32 inches from floor to countertop, designed for average-height adults. Some models go up to 36 inches (called “comfort height”), which reduces back strain and works well for taller homeowners or aging-in-place designs. Measure from the floor to elbow height on whoever uses the bathroom most, this informs your ideal height.
When ordering a vanity with top, confirm the total height (base plus top combined) and verify that the top is included and fitted. Some vanities ship with the top separate or unattached. Check sink cutout dimensions too: if you’re replacing just the top, ensure the new one’s cutout matches your existing plumbing holes. Pre-mounted tops save installation hassle but offer less customization.
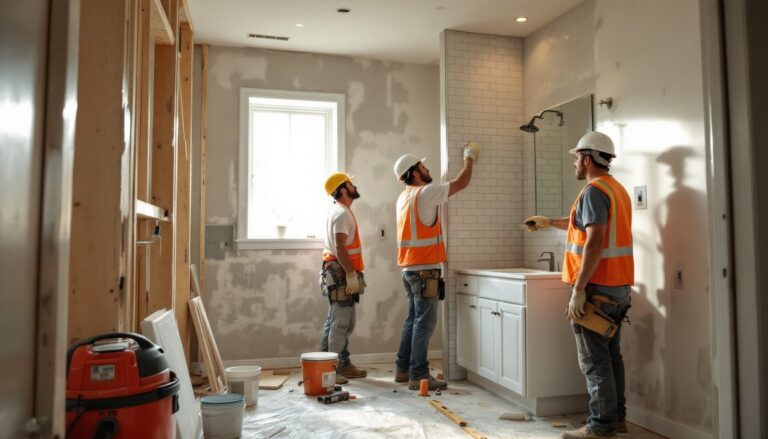
Installation Considerations and Tips
Installing or replacing a vanity with top is moderately challenging, it’s doable for a confident DIYer but involves plumbing and carpentry. If you’re simply swapping a pre-built vanity with top, the job is straightforward. If you’re customizing, hiring a pro might save headaches.
Prep work is critical. Turn off the water supply to the sink and disconnect the drain. Use a bucket to catch residual water. If the existing vanity is glued or caulked to the wall, use a flatbar to gently pry it loose. Scrape away old caulk and adhesive with a putty knife. Check the subfloor and walls for damage, water damage is common behind vanities, and any soft spots need addressing before the new unit goes in.
Check for level. Bathroom floors are often slightly out of level. Place shims under the vanity base to ensure it sits perfectly level: a tilted vanity looks unprofessional and can cause drainage issues. Use a 2-foot level placed front-to-back and side-to-side. This is where many DIYers stumble, don’t skip it.
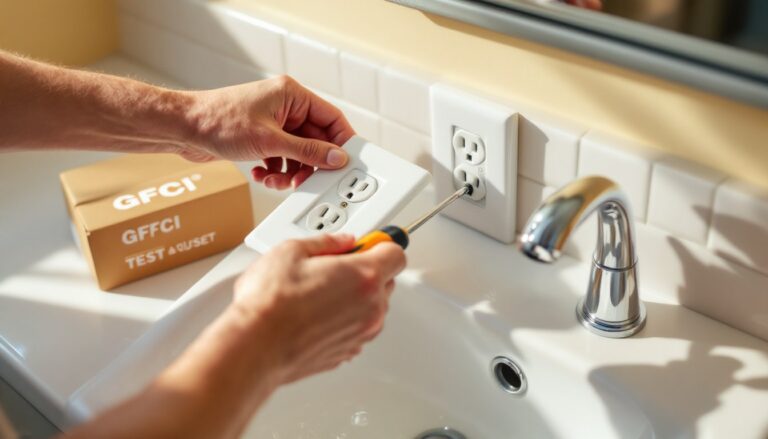
Reconnect plumbing. Modern pop-up drains and supply lines are straightforward. Use adjustable wrench-style connections (Teflon tape on threaded connections prevents leaks). Don’t overtighten, hand-tight plus a quarter turn is usually sufficient. Test for leaks immediately.
Secure the top. Most vanity tops are glued with silicone or construction adhesive. Apply a bead around the vanity rim, press the top into place, and clamp or weight it for 24 hours while the adhesive cures. Some contractors use mechanical fasteners underneath, check your top’s installation guide.
Caulk the perimeter. Once everything’s connected and cured, run a bead of silicone caulk where the top meets the wall and where the vanity meets the floor. This prevents water from seeping behind and damaging walls. Use paintable caulk if you plan to paint the base.
If plumbing or structural concerns arise during installation, stop and call a licensed plumber. Mistakes here are costly and potentially dangerous.
Maintenance and Care for Long-Lasting Vanity Tops
How you care for your vanity top determines its lifespan. Daily habits make the difference between a fixture that looks new for years and one that deteriorates quickly.
Wipe spills immediately. Water left standing on unsealed granite, marble, or wood-look tops can stain or damage finishes. Keep a soft cloth nearby: wiping takes seconds. After morning routines when toothpaste or hairspray residue accumulates, a quick wipe prevents buildup and keeps surfaces shiny.
Use appropriate cleaners. Different materials need different approaches. Cultured marble, laminate, and solid surface tops do well with mild dish soap and water or a pH-neutral bathroom cleaner. Avoid abrasive scrubbers that scratch finishes. For granite or marble, use only pH-neutral stone cleaners, acidic products (like vinegar) or bleach etch natural stone. Quartz is more forgiving: it tolerates most cleaners but avoid abrasive scouring pads.
Seal natural stone annually. If you’ve chosen granite, travertine, or marble, apply a stone sealer once a year (or per manufacturer specs). Sealing takes 30 minutes and creates a protective barrier against stains and moisture. Unsealed stone absorbs liquids and is prone to permanent discoloration. This is the single most important maintenance step for natural stone.
Prevent heat damage. Even heat-resistant tops should be protected from direct contact with hot hair tools, curling irons, or pots. A small mat under grooming appliances prevents thermal shock and surface damage. Most damage isn’t from regular use but from concentrated heat sources placed directly on the surface.
Handle moisture carefully. Ventilate your bathroom during and 20 minutes after showers to reduce humidity. Excess moisture around sink areas (especially near grout or caulk seams) invites mold and mildew. Keep drain areas clear to prevent standing water. In humid climates, a small fan or dehumidifier in the bathroom is worthwhile.
Regular maintenance costs nothing but prevents expensive repairs or premature replacement.
Design Styles: Finding Your Perfect Bathroom Aesthetic
The vanity with top is often the bathroom’s focal point. Its style sets the tone for the entire space.
Contemporary and modern designs favor clean lines, minimal hardware, and materials like white quartz or pale gray concrete-look tops. Floating vanities without visible bases emphasize openness. These styles work beautifully in smaller bathrooms and pair well with minimalist hardware and lighting.
Traditional and transitional bathrooms embrace warm woods, ornate cabinet details, and materials like granite or cultured marble. Bronze or brass fixtures complement these styles. Top colors often lean toward warm neutrals, beige, taupe, or soft gray granite.
Rustic and farmhouse aesthetics favor reclaimed wood bases with weathered finishes paired with white or pale marble tops. Vessel sinks (bowls sitting on top rather than mounted into the countertop) are popular in this category. The contrast between rough wood and refined stone creates charm.
Industrial styles combine concrete-look tops with metal frames or dark wood bases. Raw materials and visible hardware feel authentic. This works particularly well in lofts or homes with brick and exposed ductwork.
Color trends in 2026 continue the shift toward warm neutrals and nature-inspired tones. Creamy whites, soft greens, and warm grays dominate. Bold jewel tones and dark vanities remain fashionable for accent bathrooms, though they’re less forgiving in small spaces. If you’re uncertain about your direction, browsing design inspiration on Remodelista and home design shows on HGTV provides current trends and real-world examples. Remember that trends fade: choose materials and colors you’ll genuinely enjoy living with for 10+ years.
Budget-Friendly Options and DIY Projects
Vanity costs span a vast range. A basic laminate vanity with top might run $150–$300 from a big-box retailer. Mid-range cultured marble or ceramic tile options cost $400–$800. Premium quartz or granite tops with quality cabinetry easily exceed $1,500–$3,000. Regional pricing fluctuates, so get local quotes.
Smart budget moves: Buy pre-assembled vanity-top combos rather than sourcing them separately, you’ll save 15–25% and hassle. Choose ready-made sizes instead of custom orders. If you’re handy, DIY installation saves $200–$500 in labor, but only if you’re confident in plumbing connections.
Refurbishing is underrated. If your existing vanity has good bones, replacing just the top is far cheaper than a full unit replacement. Sanding, staining, or painting the cabinet gives a fresh look for minimal cost. This works especially well with cultured marble or ceramic tile tops, both are affordable and durable.
One clever project: If you have an old dresser or console table, you can repurpose it as a vanity base. Add a cultured marble or tile top, cut a sink hole, and plumb in faucet and drain. This DIY approach costs $300–$600 and creates a unique, personalized look. Ensure the base is structurally sound and sealed properly to withstand bathroom moisture.
Don’t compromise on plumbing quality to save money. Cheap faucets leak and corrode quickly. Invest in mid-range brass or stainless steel fixtures that’ll outlast bargain options by years.